

Microsoft SharePoint Data Source
Load data from Microsoft SharePoint
Authentication Setup
Section titled “Authentication Setup”To connect to SharePoint, you’ll need to set up authentication using Microsoft Entra ID (formerly Azure AD):
-
Create an App Registration in Microsoft Entra ID (Microsoft Documentation)
-
Configure Microsoft Graph API Permissions for your app. You can choose between two permission approaches:
Option 1: Tenant-wide Access (Traditional)
Section titled “Option 1: Tenant-wide Access (Traditional)”- Sites.ReadAll (Application Permission) - Required to read items in all site collections
- Files.ReadAll (Application Permission) - Required to read all files that app has access to
- BrowserSiteLists.Read.All (Application Permission) - Required to read all SharePoint lists
Option 2: Site-specific Access (Recommended for Security)
Section titled “Option 2: Site-specific Access (Recommended for Security)”- Sites.Selected (Application Permission) - Allows access only to specific SharePoint sites
- Files.ReadAll (Application Permission) - Required to read all files that app has access to
- BrowserSiteLists.Read.All (Application Permission) - Required to read all SharePoint lists
-
Grant admin consent for each permission in the Azure Portal
-
If using Sites.Selected permission, you must explicitly grant access to specific sites:
a. Find your site ID using PowerShell or Graph API:
Terminal window # Using PowerShell with PnP moduleConnect-PnPOnline -Url "https://yourtenant.sharepoint.com/sites/yoursite" -InteractiveGet-PnPSite | Select-Object IdOr via Graph API:
Terminal window GET https://graph.microsoft.com/v1.0/sites/yourtenant.sharepoint.com:/sites/yoursiteb. Grant permission to the specific site using PowerShell:
Terminal window # Grant permission to specific siteGrant-PnPAzureADAppSitePermission -AppId "your-app-id" -DisplayName "YourAppName" -Site "https://yourtenant.sharepoint.com/sites/yoursite" -Permissions ReadOr using Microsoft Graph API:
Terminal window POST https://graph.microsoft.com/v1.0/sites/{site-id}/permissions{"roles": ["read"],"grantedToIdentities": [{"application": {"id": "your-app-id"}}]} -
Note down the following values which will be needed for configuration:
- Client ID (Application ID)
- Client Secret (generate in Certificates & Secrets)
- Tenant ID (Directory ID)
- Site ID (if using Sites.Selected permission)
For more details on Microsoft Graph APIs and permissions, see the Microsoft Graph documentation.
Configure via UI
Section titled “Configure via UI”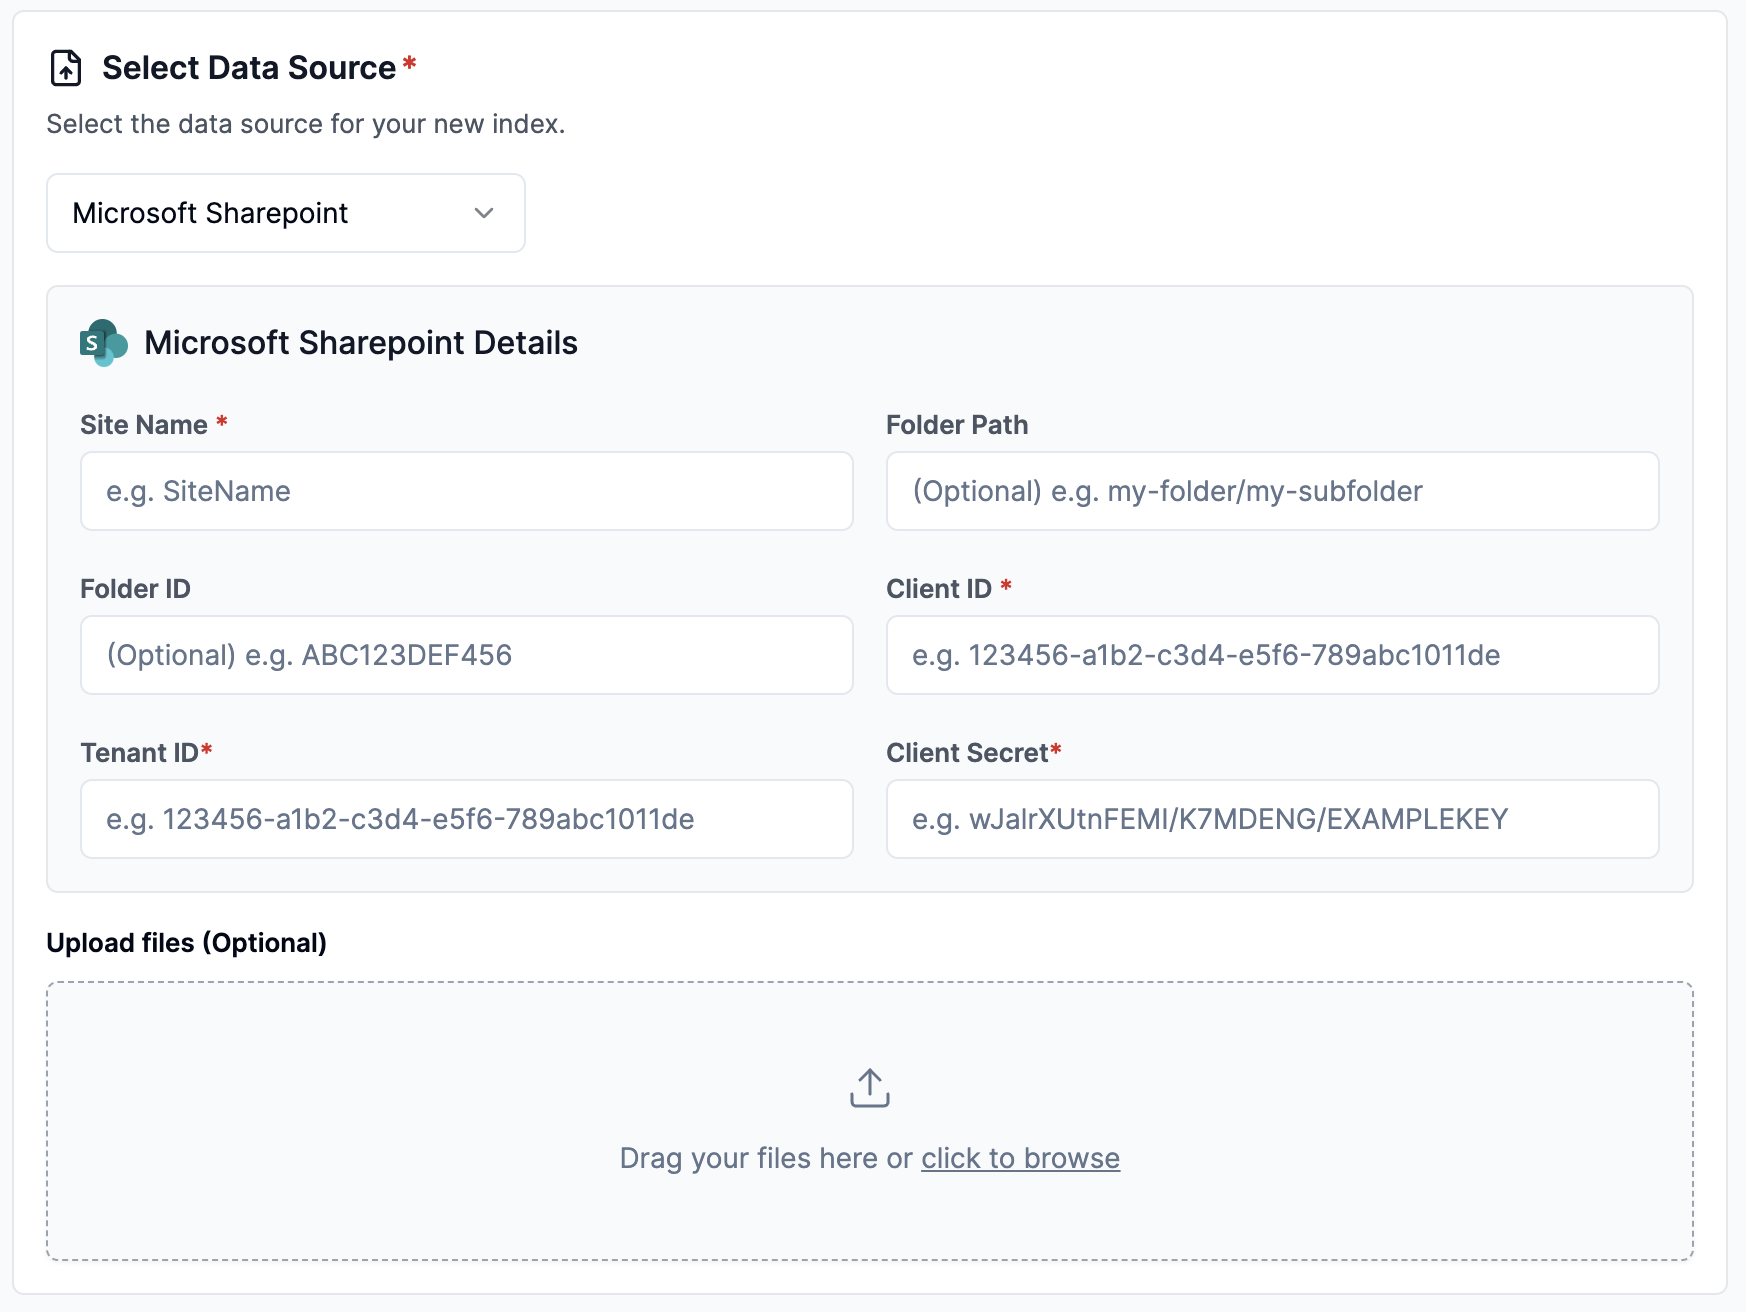
Configure via API / Client
Section titled “Configure via API / Client”from llama_cloud.types.data_source_create_params import ( CloudSharepointDataSource,)
# Option 1: Using site_name (for Sites.ReadAll permission)data_source = client.data_sources.create( name="my-data-source", component=CloudSharepointDataSource( site_name='<site_name>', folder_path='<folder_path>', # optional client_id='<client_id>', client_secret='<client_secret>', tenant_id='<tenant_id>', ), source_type="MICROSOFT_SHAREPOINT", project_id="my-project-id",)
# Option 2: Using site_id (recommended for Sites.Selected permission)data_source = client.data_sources.create( name="my-data-source", component=CloudSharepointDataSource( site_id='<site_id>', # Use site ID when using Sites.Selected permission folder_path='<folder_path>', # optional client_id='<client_id>', client_secret='<client_secret>', tenant_id='<tenant_id>', ), source_type="MICROSOFT_SHAREPOINT", project_id="my-project-id",)// Option 1: Using site_name (for Sites.ReadAll permission)const dataSourceWithName = await client.dataSources.create({ name: 'my-data-source', component: { site_name: '<site_name>', folder_path: '<folder_path>', // optional client_id: '<client_id>', client_secret: '<client_secret>', tenant_id: '<tenant_id>', }, source_type: 'MICROSOFT_SHAREPOINT', project_id: 'my-project-id',});
// Option 2: Using site_id (recommended for Sites.Selected permission)const dataSourceWithId = await client.dataSources.create({ name: 'my-data-source', component: { site_id: '<site_id>', // Use site ID when using Sites.Selected permission folder_path: '<folder_path>', // optional client_id: '<client_id>', client_secret: '<client_secret>', tenant_id: '<tenant_id>', }, source_type: 'MICROSOFT_SHAREPOINT', project_id: 'my-project-id',});from llama_cloud.types import CloudSharepointDataSource
# Option 1: Using site_name (for Sites.ReadAll permission)ds = { 'name': '<your-name>', 'source_type': 'MICROSOFT_SHAREPOINT', 'component': CloudSharepointDataSource( site_name='<site_name>', folder_path='<folder_path>', # optional client_id='<client_id>', client_secret='<client_secret>', tenant_id='<tenant_id>', )}
# Option 2: Using site_id (recommended for Sites.Selected permission)ds = { 'name': '<your-name>', 'source_type': 'MICROSOFT_SHAREPOINT', 'component': CloudSharepointDataSource( site_id='<site_id>', # Use site ID when using Sites.Selected permission folder_path='<folder_path>', # optional client_id='<client_id>', client_secret='<client_secret>', tenant_id='<tenant_id>', )}
data_source = client.data_sources.create_data_source(request=ds)// Option 1: Using site_name (for Sites.ReadAll permission)const dsWithName = { 'name': 'sharepoint', 'sourceType': 'MICROSOFT_SHAREPOINT', 'component': { 'site_name': 'site_name', 'folder_path': 'folder_path', // optional 'client_id': 'client_id', 'client_secret': 'client_secret', 'tenant_id': 'tenant_id', }}
// Option 2: Using site_id (recommended for Sites.Selected permission)const dsWithId = { 'name': 'sharepoint', 'sourceType': 'MICROSOFT_SHAREPOINT', 'component': { 'site_id': 'site_id', // Use site ID when using Sites.Selected permission 'folder_path': 'folder_path', // optional 'client_id': 'client_id', 'client_secret': 'client_secret', 'tenant_id': 'tenant_id', }}
data_source = await client.dataSources.createDataSource({ body: dsWithId // or dsWithName})